Git Sync
Git Sync connects your library to a Git repository you own, so your timelines stay in step across devices and every change is saved as a version you can go back to. It is a desktop app feature and is still marked experimental.
What you get once a repo is connected:
- Cross-device sync - the same library on every computer you connect
- Version history - each sync is a commit, and any past version can be restored
- Shareable viewer links - if the repo is public, every synced timeline has a link that opens in the web viewer
Timelines never uploads anything to a server run by us. Your data goes only to the repository you point it at, using credentials you create.
What gets stored
Each timeline is written to the repo as a packaged .timeline file, the same format described in Exporting. That means images and notes travel with the timeline, not just the raw data. Folders in your library become folders in the repo.
Step 1: Create a repository
Create a new, empty repository on GitHub. Git Sync only works with GitHub for now. Do not add a README, .gitignore, or license from the setup screen; the app writes its own files on the first sync.
Choose the visibility deliberately. A public repo is required for viewer share links; a private repo keeps everything to yourself and still syncs and versions normally. Either way, anything you sync stays in the repository's history even after you later remove it, so if a timeline is sensitive, exclude it before connecting or keep the repo private.
Note the repository's HTTPS clone URL, which looks like https://github.com/you/timelines-sync.git.
Step 2: Create a token
The app signs in with a token rather than your password.
-
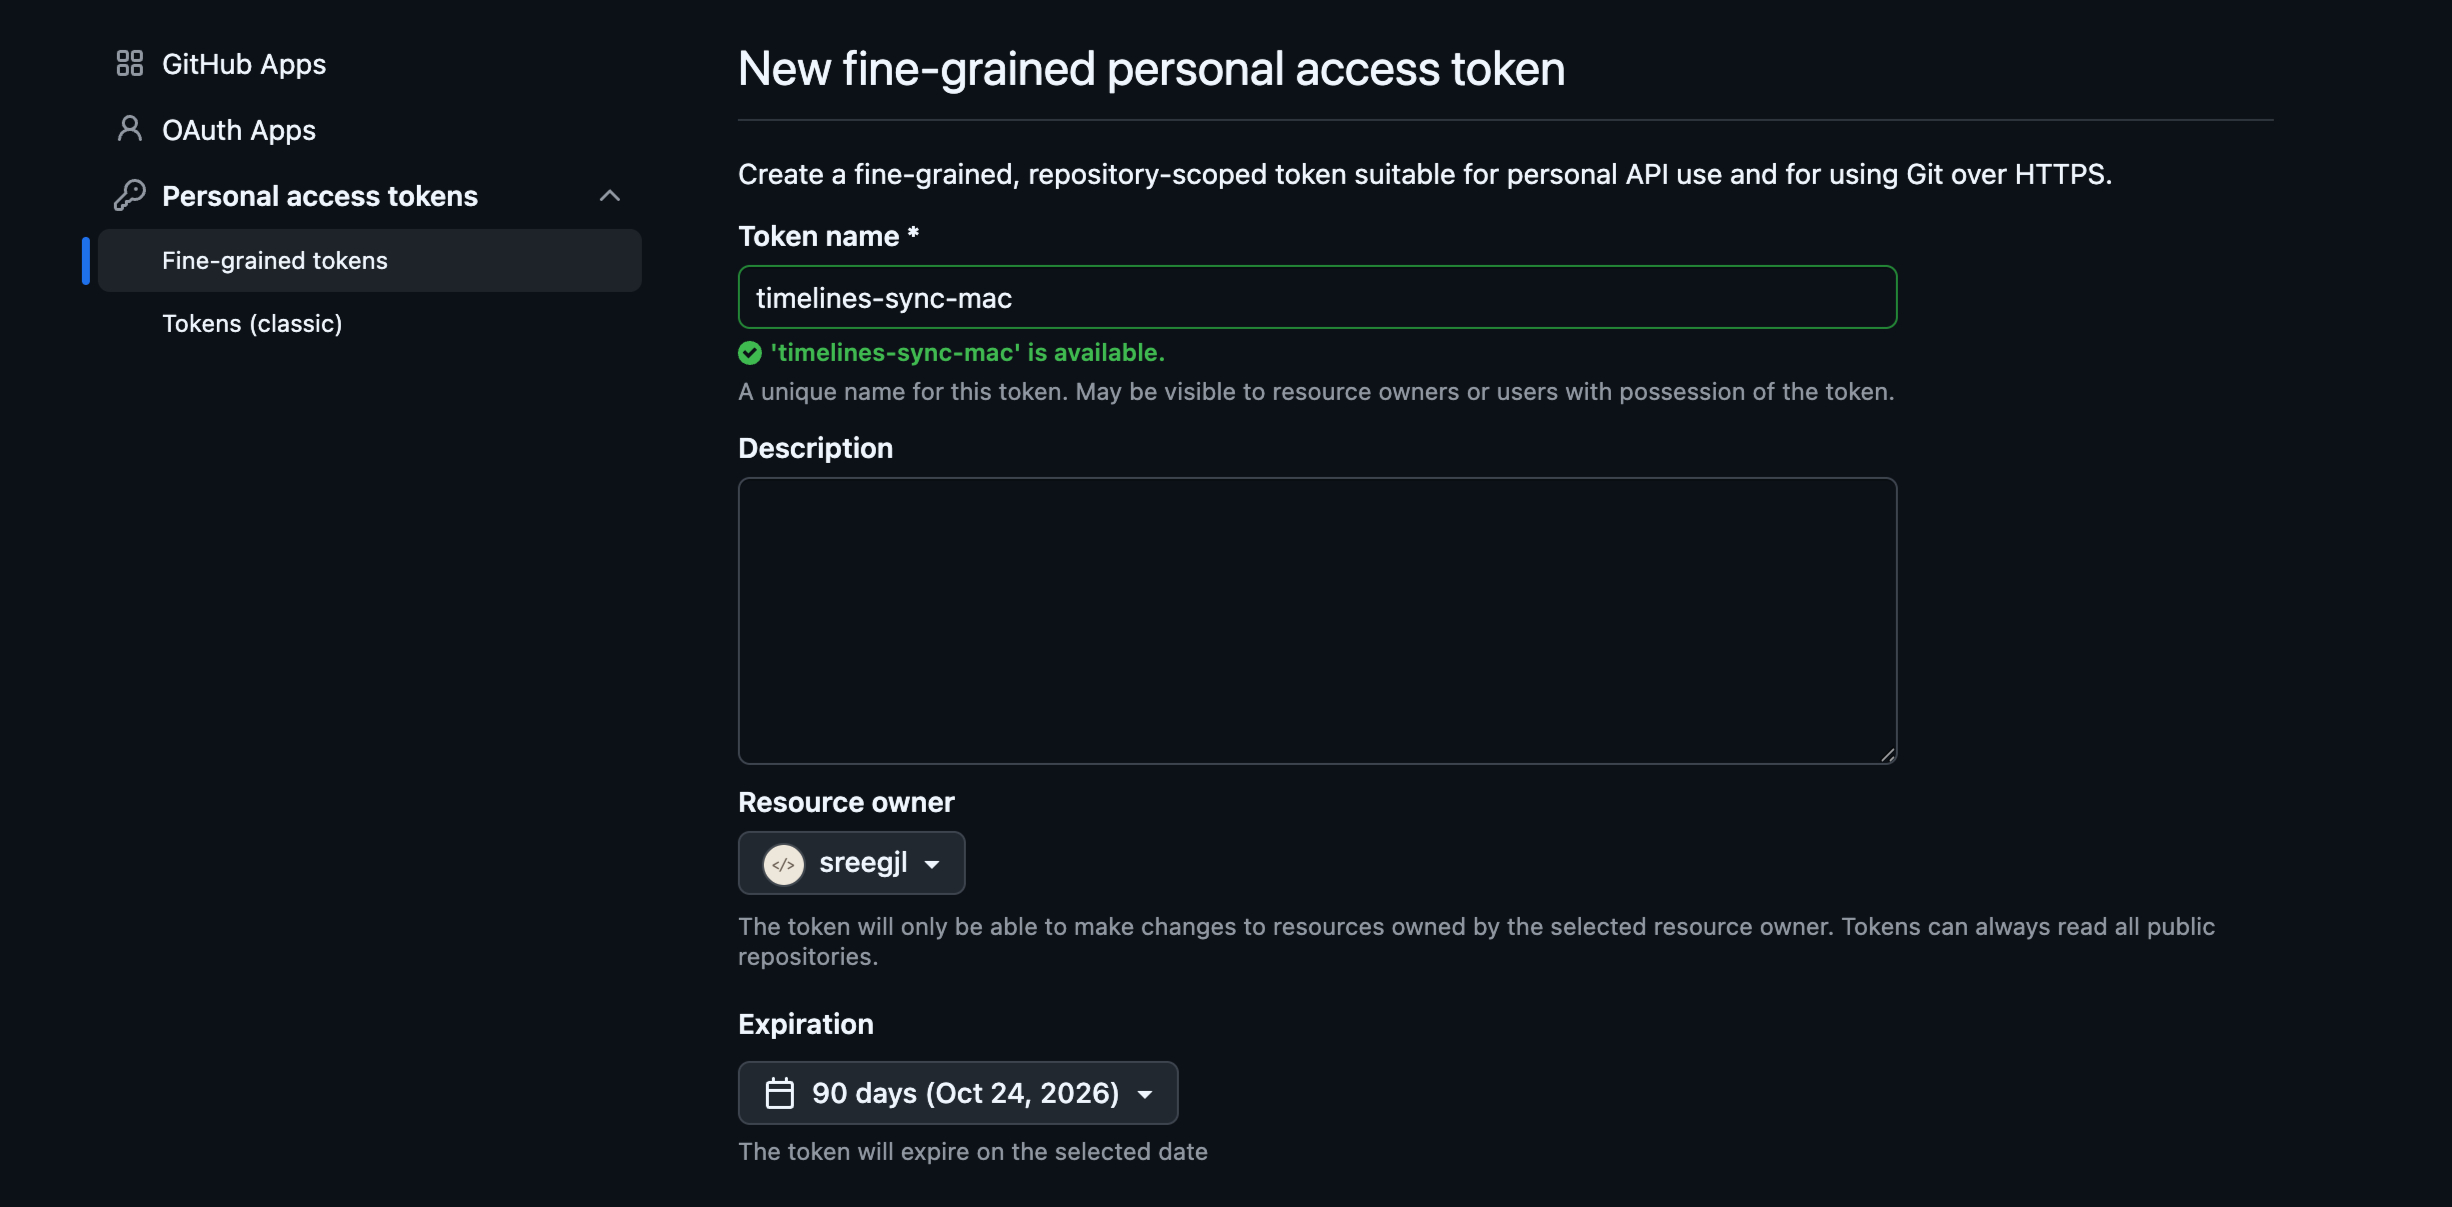
On GitHub, go to Settings > Developer settings > Personal access tokens > Fine-grained tokens.
-
Choose Generate new token.
-
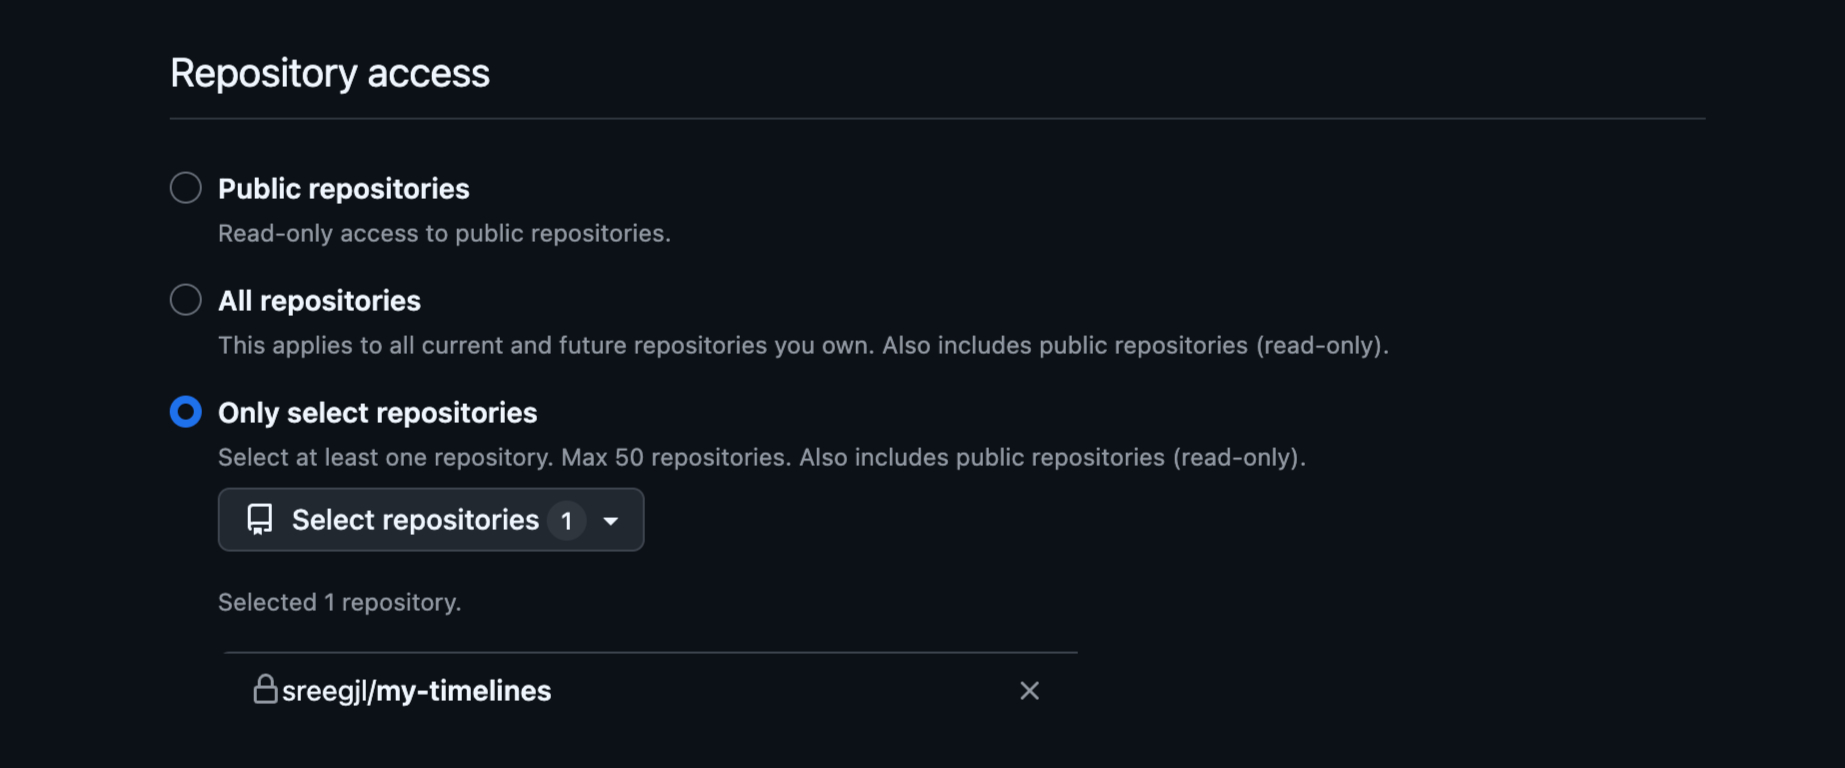
Under Repository access, pick Only select repositories and select the repo you just created.
-
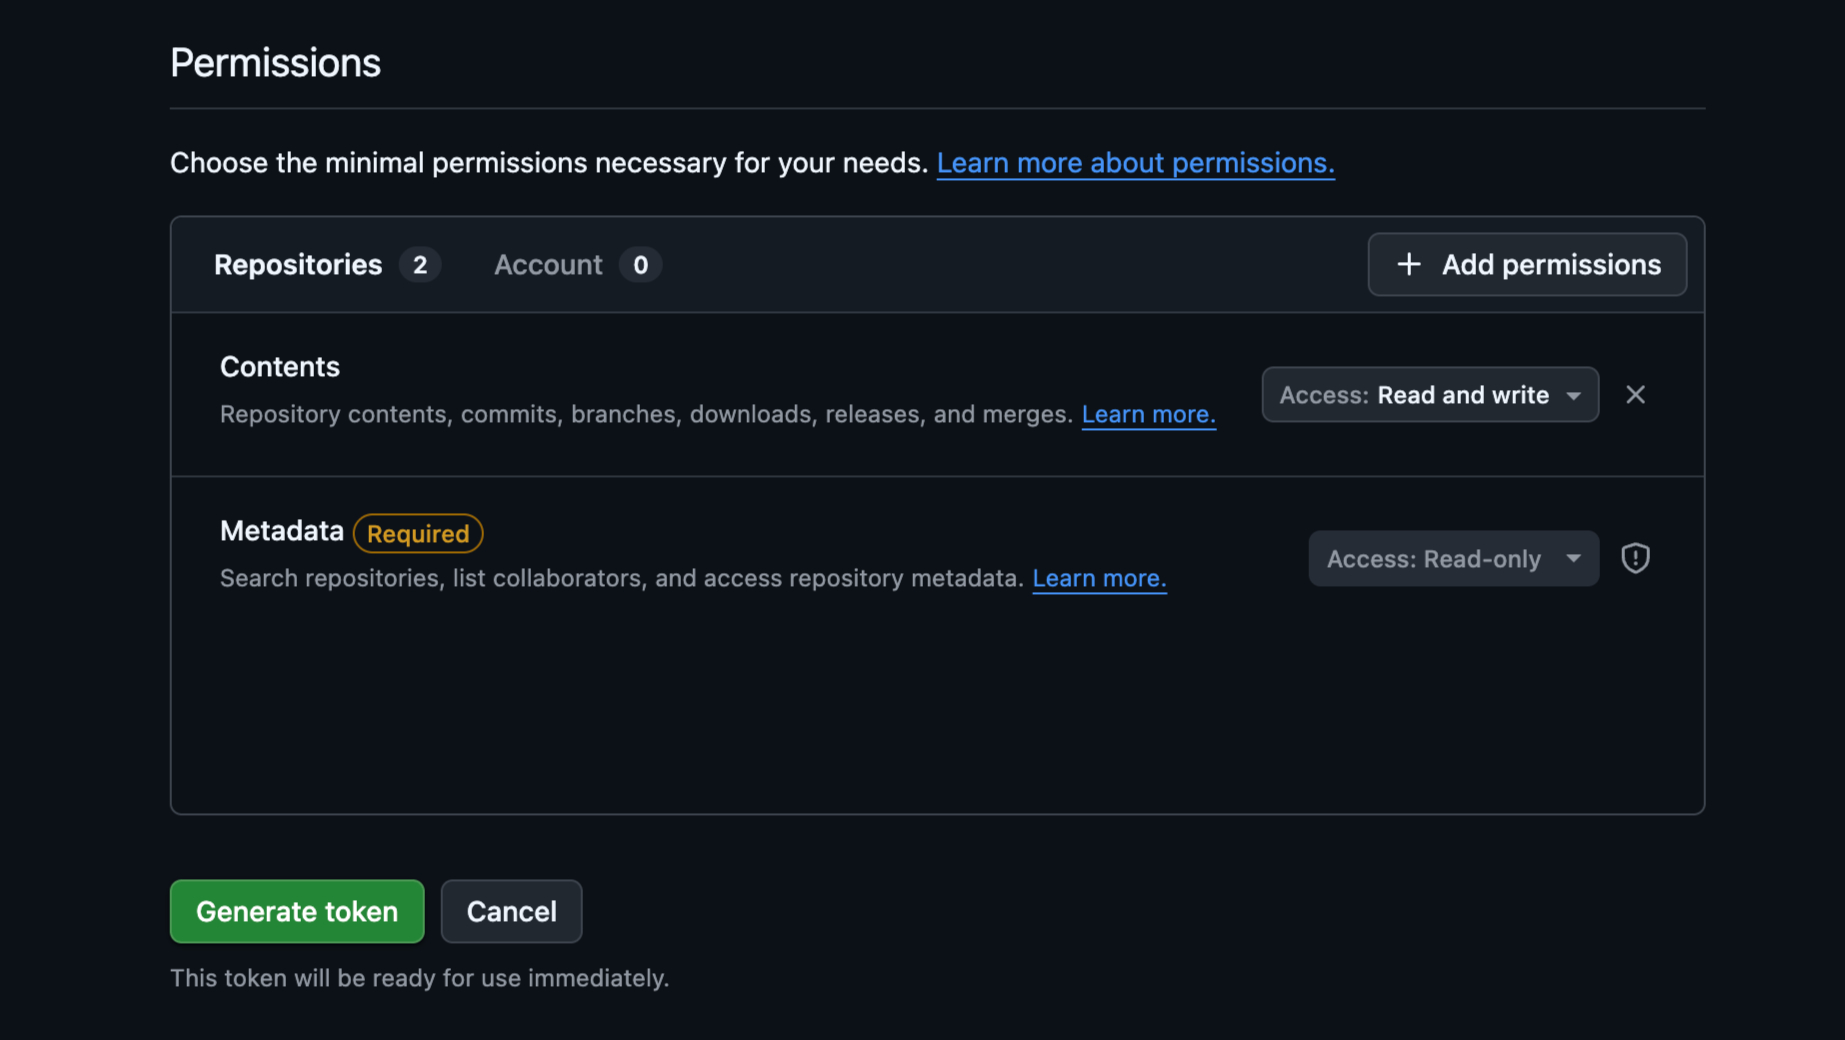
Under Repository permissions, set Contents to Read and write.
-
Generate the token and copy it. GitHub shows it only once.
A classic token with the repo scope also works, but a fine-grained token limited to the single repository is safer and is what the app recommends.
The token is stored locally in the app's user-data folder. When OS encryption is available, it is encrypted using Electron's secure storage API. It is never written to your settings file or Git repository.
Step 3: Connect in Timelines
- Open Settings > Sync (Experimental).
- Paste the Repository URL (the HTTPS clone URL from step 1).
- Set the Branch, usually
main. - Paste the Personal Access Token.
- Choose Connect Repo.
On the first connect the app clones the repo, packages every timeline in your library, commits them, and pushes. Large libraries can take a minute. When it finishes, the Sync panel switches to its connected view and the status row shows the last sync time.
Step 4: Other devices
On a second computer, install Timelines and repeat step 3 with the same repository URL and branch. Instead of pushing your library up, the app pulls the repo down and imports every timeline it finds into the local library. From then on both devices sync against the same repo.
Generating a separate token per device is good practice, so you can revoke one machine without disturbing the others.
Everyday use
The connected Sync panel gives you:
- Status - what the sync engine is doing right now, plus a Sync Now button to run a pass immediately
- Repository - the connected remote and branch, with Open Remote and Disconnect
- Personal Access Token - paste a replacement to rotate an expiring token without reconnecting
- Machine Label - the name this device uses in commit messages and conflict copies
- Auto Sync - sync automatically after the chosen number of idle minutes
With Auto Sync on, editing a timeline queues it and the pass runs once you have been idle for the interval. A sync also runs when the app starts and when it quits, and you can always trigger one with Sync Now.
Every pass does the same thing in order: package your changed timelines, commit them, pull anything new from the repo, push, and import the changes other devices made.
Choosing what syncs
The Synced Timelines tree lists your library with a checkbox per timeline and folder. Unchecking one adds it to an exclusion list that lives in the repository, so your other devices stop syncing it too once they pull the change.
Unchecking stops future syncs. It does not remove anything already pushed, and it does not remove it from the repository's history.
Version history
Right-click a timeline in the library and choose Version History to see every synced version, newest first, with the date, the device it came from, and a short summary of what changed in that sync.
Restore as Copy brings a past version back as a new timeline next to your current one, so nothing is overwritten and you can compare the two before deleting either.
Sharing viewer links
If your repo is public, right-click a timeline and choose Share Viewer Link for two links:
- Latest Branch Link - always shows the newest synced version
- Last Synced Exact-Version Link - pinned to one specific version and never changes
Both open the timeline in the web viewer with its images and notes intact. If the timeline has unsynced edits, the dialog offers Sync & Copy so the link reflects what you see in the app.
For a private repo the dialog explains that viewer links will not work for other people and offers a shortcut to the repo's settings, where you can change visibility.
Conflicts
If the same timeline changed on two devices between syncs, nothing is thrown away. The version already in the repo keeps its place, and your local version is saved beside it as a separate timeline with -conflict- and the device name in its filename. It shows a Conflict badge in the Synced Timelines tree.
Open both, merge whatever you want by hand, then delete the copy you no longer need.
Repository options
- Generate README - writes a README into the repo listing your timelines and their viewer links, and keeps it up to date as your library changes. Turn it off to keep the repository file-only; the generated README is removed on the next sync. If you write your own README instead, the app leaves it alone whether the setting is on or off.
- Mirror - the app keeps its own clone of the repo separate from your library, and shows its size. Rebuild Mirror deletes and re-creates that clone, which is the fix if the mirror grows large or looks out of step. Your timelines are not touched.
- Disconnect - forgets the remote and the saved token on this device, and asks whether to delete the local mirror. Your library and the repository both stay as they are, and you can reconnect later.
Troubleshooting
"The saved token no longer works." The token expired or was revoked. Create a new one as in step 2 and paste it into the Personal Access Token field, then choose Update Token. Nothing is lost in the meantime; changes stay committed locally and push once the token works.
Offline. Your changes are packaged and committed locally and pushed on the next successful pass. Working without a connection is safe.
A timeline is not syncing. Check that it is still ticked in the Synced Timelines tree, and that neither it nor a parent folder is excluded.
A timeline is too large. GitHub rejects any single file over 100MB, and a package bundles all of a timeline's images. If one timeline exceeds the limit, the app syncs everything else and shows an error naming it. Shrinking or unlinking its largest images is the fix.
Connect fails right away. Confirm you pasted the HTTPS URL rather than an SSH one, that the branch name matches the repo, and that the token has Contents: Read and write on that repository.
Git Sync is experimental. Please report anything that looks wrong on GitHub.